Agents can manage Webflow CMS collections and items, edit pages, read form submissions, upload assets, and publish sites. Connect with your own Webflow app in a few minutes.
OneCLI connects AI agents to Webflow. Agents can read and edit CMS content, update pages and components, work with forms and assets, and publish sites. The gateway injects the token into requests to api.webflow.com, so your agent never sees it.To connect, you create a Webflow app in your workspace and paste its Client ID and Client Secret into OneCLI. This takes a few minutes, and you need to be an admin of the Webflow workspace. One-click Connect is coming once Webflow approves OneCLI’s app.
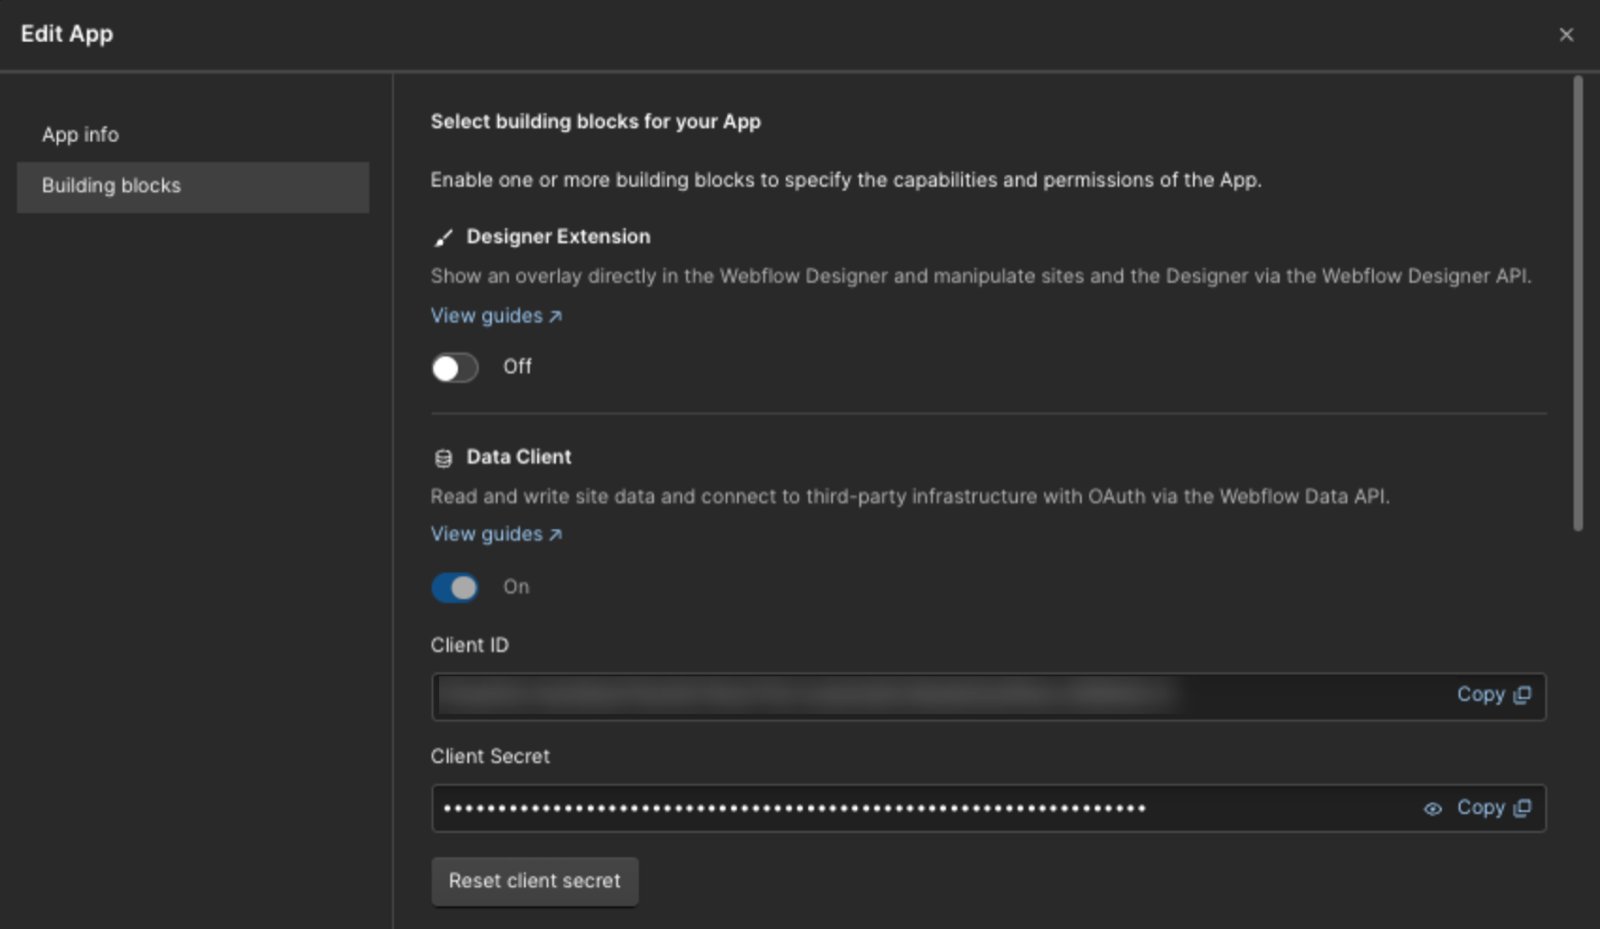
In Webflow, open your workspace and go to Apps & Integrations > Develop > Create an App. Name it OneCLI and add a homepage URL. Leave Restrict App installation to a specific site off, then click Continue.Under building blocks, leave Designer Extension off and turn Data Client on.
2
Add the redirect URI and scopes
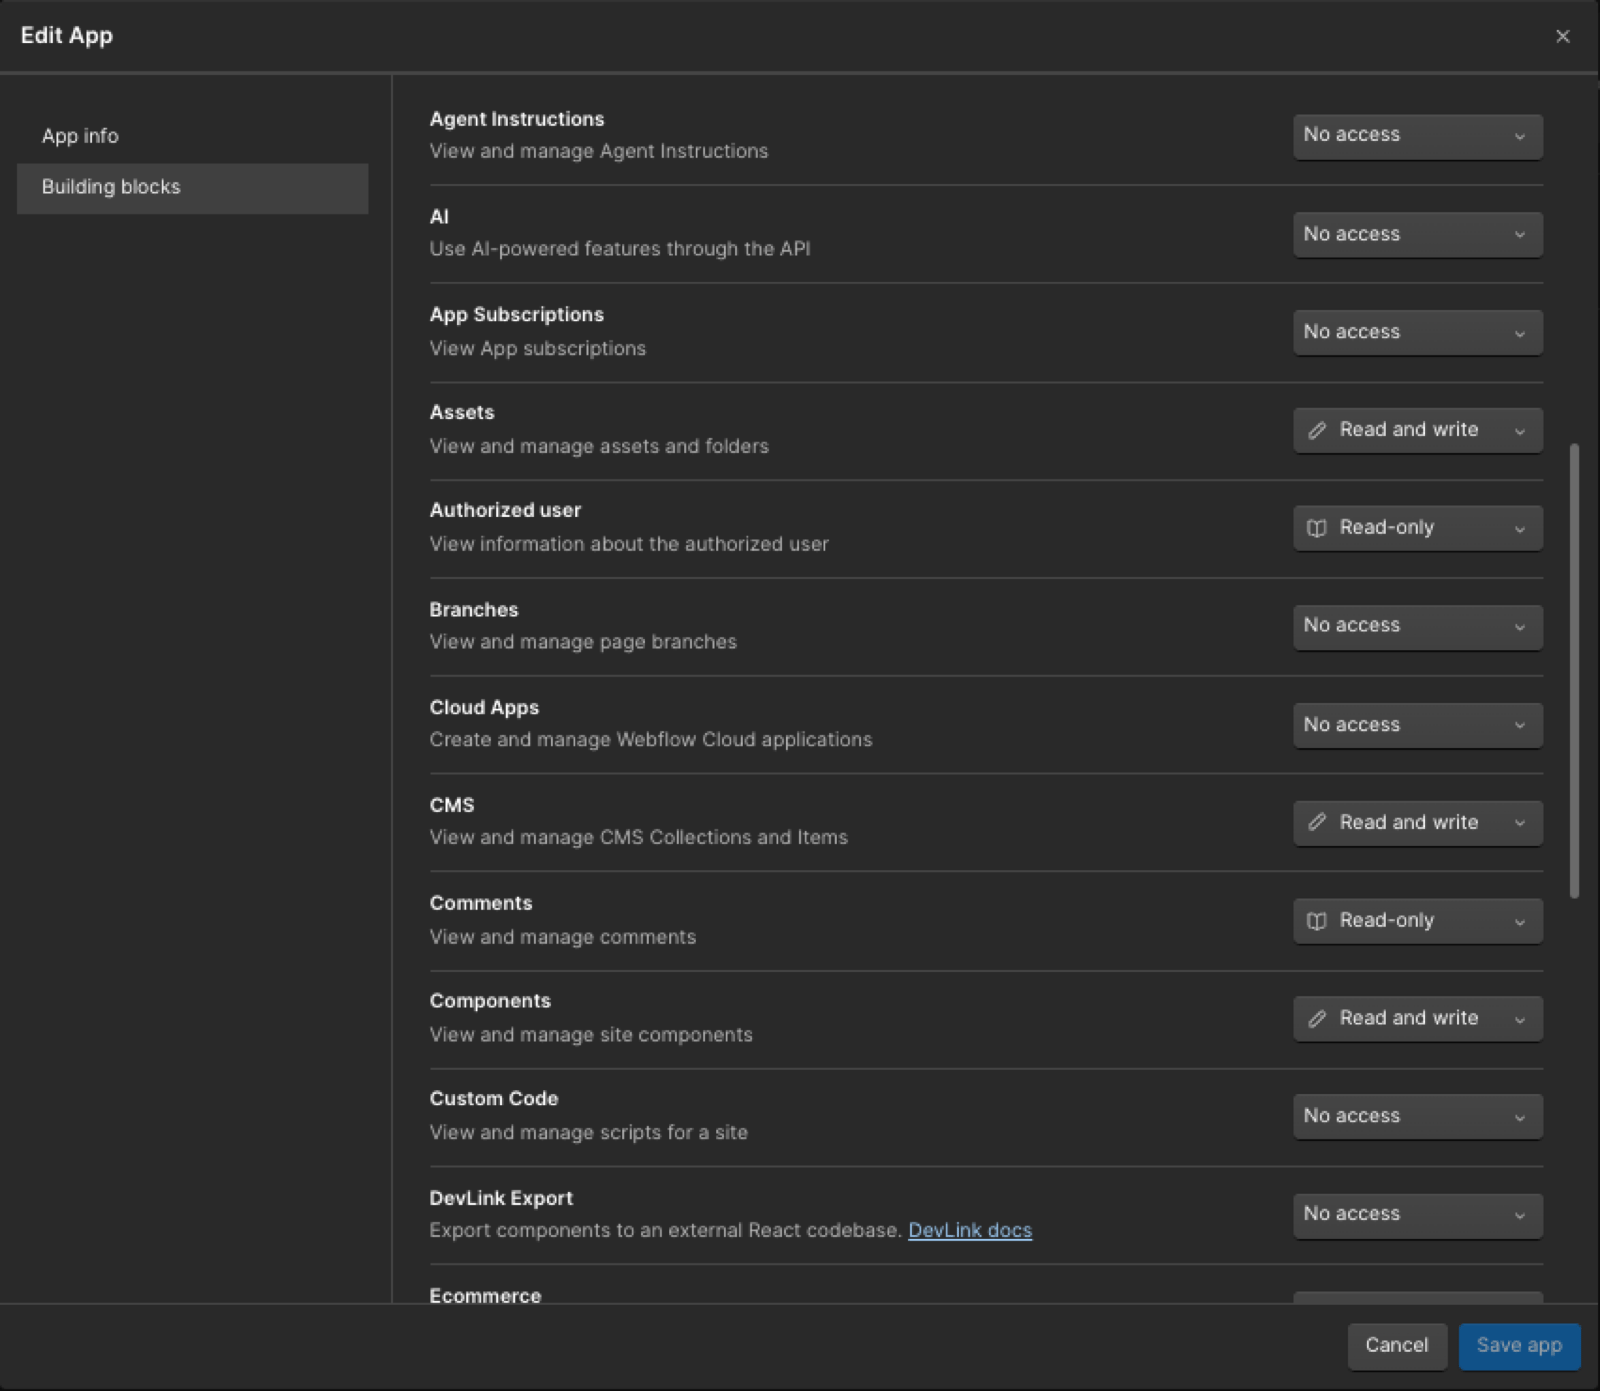
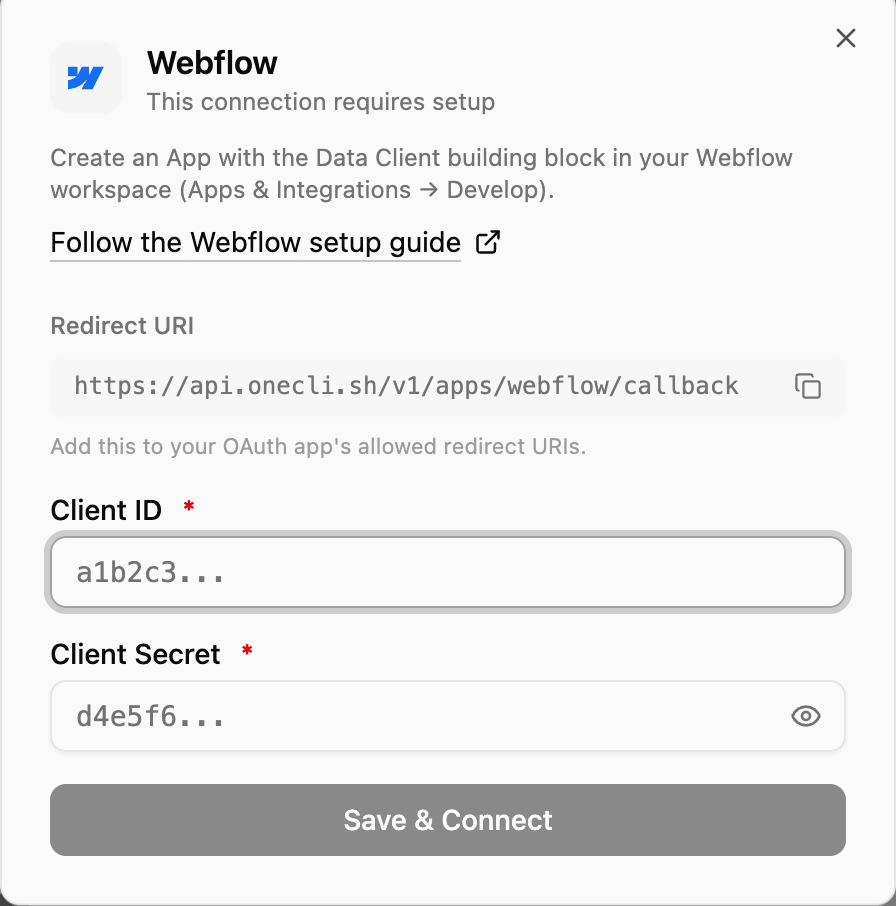
In OneCLI, open Connections > Webflow and click Connect. The setup dialog shows a Redirect URI. Copy it and paste it into the Redirect URI field in Webflow. On OneCLI Cloud it’s https://api.onecli.sh/v1/apps/webflow/callback. Self-hosted OneCLI shows its own.Then set these scopes. OneCLI requests all of them, and Webflow rejects the connection if the app is missing any one. Leave everything else on No access.
Set each area to Read and write or Read-only as in the table. Leave the rest on No access.
Click Create App.
3
Copy the Client ID and Client Secret
On the app card, click ⋯ > Edit App. The card itself isn’t clickable. Copy the Client ID and Client Secret. Only workspace admins can see the secret.
The Client ID and Client Secret are under Data Client on the Building blocks tab.
4
Connect in OneCLI
Back in the OneCLI setup dialog, paste the Client ID and Client Secret, then click Save & Connect.
The Webflow setup dialog in OneCLI. Copy the Redirect URI from here, then paste your Client ID and Client Secret.
5
Authorize in Webflow
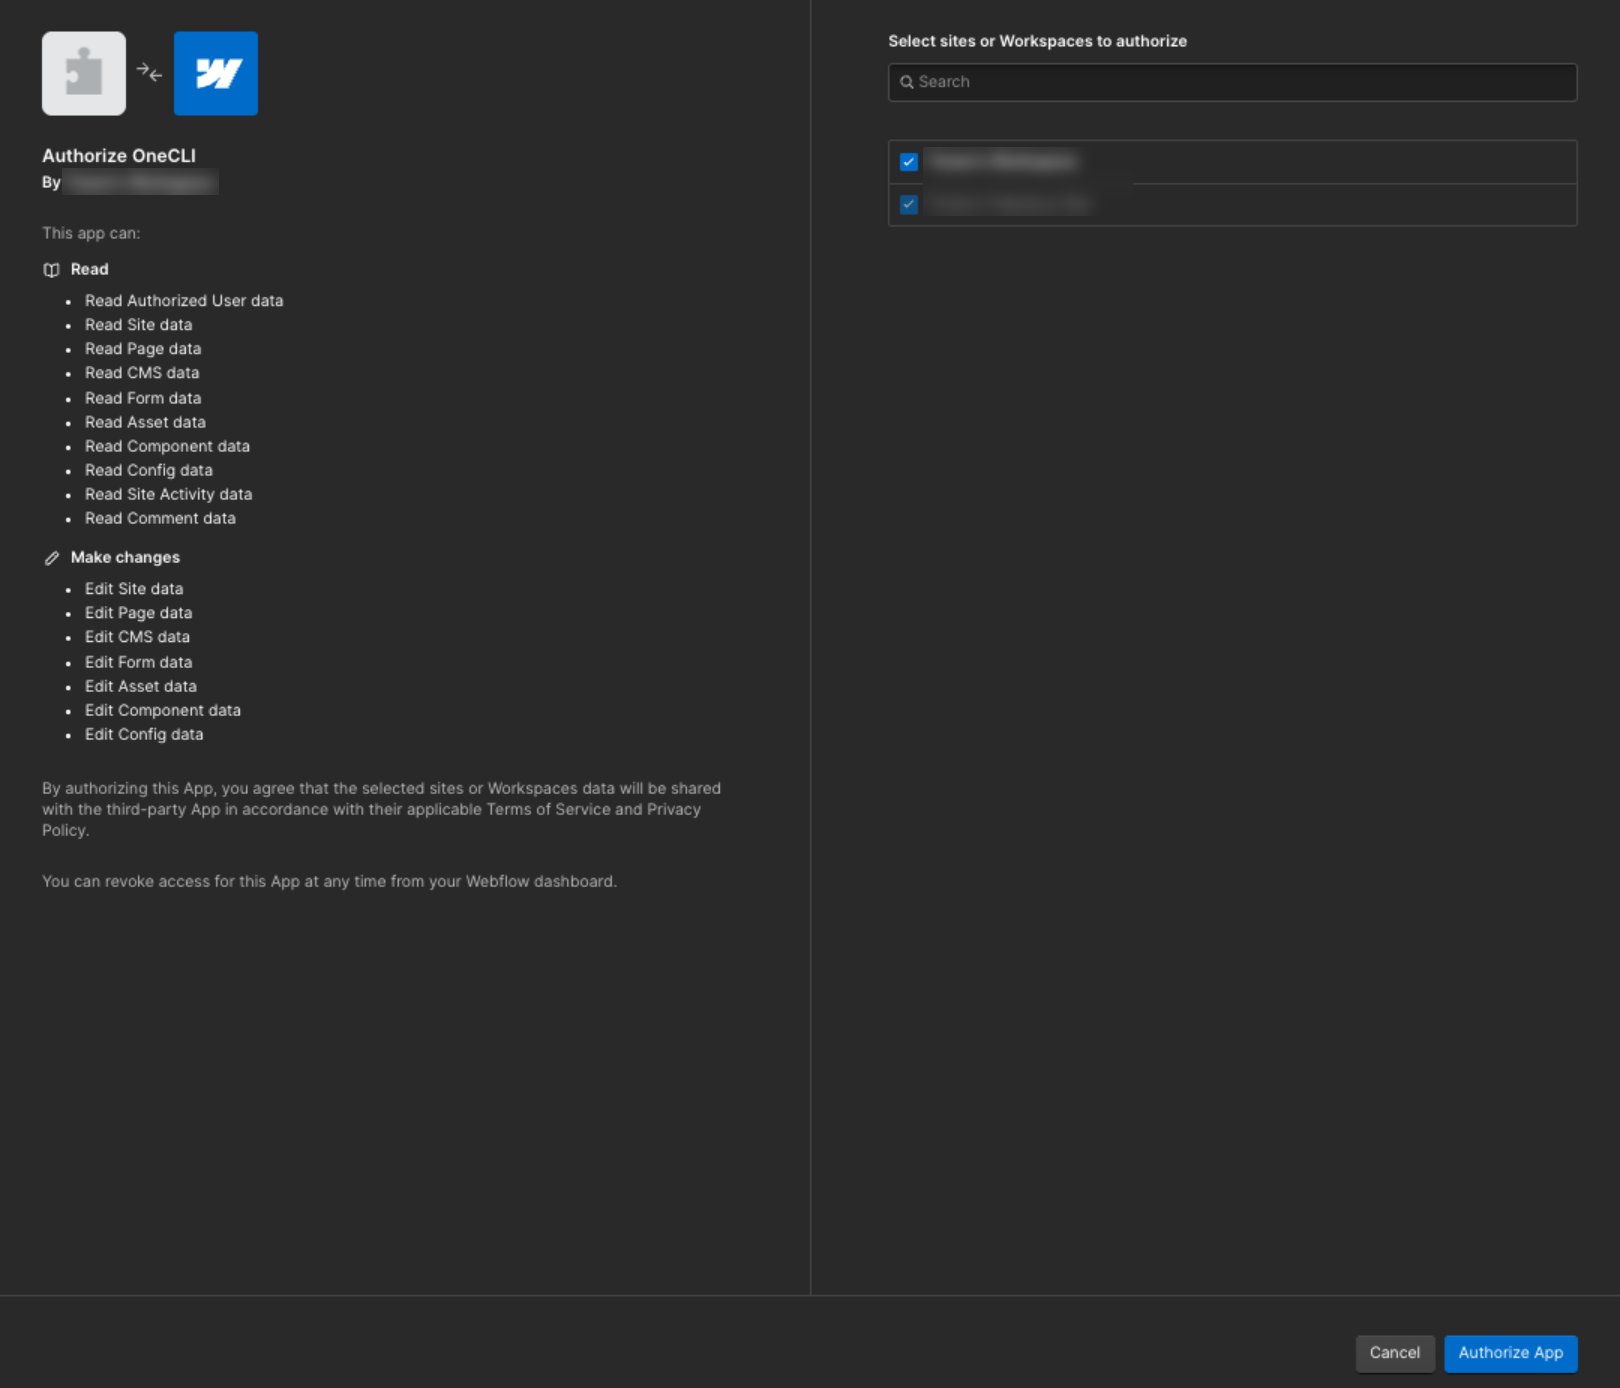
Webflow asks which sites or workspace OneCLI can access. Pick them and click Authorize App. The connection shows as Connected with your Webflow email.
Webflow lists the permissions OneCLI requests. Pick the sites or workspace your agents need.
OneCLI can only reach the sites you pick on the Webflow screen. To add a site later, connect again and select it. Treat the Client Secret like a password.
Grant the connection to each agent that needs it, and choose per tool what runs freely, what needs approval, and what’s blocked. For example, let an agent read and draft CMS items freely, but put Publish site, Publish items, and every delete behind approval, since they change your live site. Organization rules add guardrails on top. A blocked request never reaches Webflow.To disconnect, remove the connection in Connections > Webflow, then revoke OneCLI in Webflow under Workspace settings > Apps & Integrations.